NEW WEBSITE

Featured

After about a year of trying, I have published a new website: https://www.featheredstarproductions.com/

The new site is an updated format and much simplified. Although it offers fewer items in the store, it allows me to have a QUILT GALLERY and show a variety of FEATHERER STAR QUILT BLOCKS. It is not perfect or complete. I plan to add more blocks, quilts, and items for sale. But for now it is enough, and I hope you enjoy it.

Marsha McCloskey

3/29/2023

Bias-Strip Piecing Yield Chart & Strip Width

This is for the students who are taking the online workshop………

Yield Chart

This chart tells the number of 1-1/2″ (cut size) feather squares that can be cut from various sizes of beginning squares. Large beginning squares will obviously yield more feathers than smaller ones. Individual sewing and cutting habits will affect the yield. I use a strip width of 2″ when cutting most feather squares because it is an easy number to remember and cut. It is a little wide for the 1-1/2″ square size, but it will also accommodate squares cut in smaller or slightly larger sizes. If your feathers are to be cut smaller than 1-1/2″, the bias strips could be cut narrower, but I find it difficult to press seams open when strips are less than 2″ wide. If the cutting dimension of the feather square is larger than 2″, a wider strip should be used.

Formula for Strip Width

     To figure the proper strip width for bias-strip piecing of other sizes of feather squares, do this:

1. On graph paper, draw a square the finished size of the feather square. Add a 1/4″ seam allowance. Draw a diagonal line across the

whole square.

2. Measure from the center diagonal line to one corner of the square. This distance is “x”.

3. To get the proper strip width, add 3/4″ for seam allowances and “wiggle room.” If the number doesn’t match the lines on your cutting ruler or will be hard to cut, round the number up to one that will be easy to measure.

Feathered Star Quilting Techniques with Marsha McCloskey Workshop runs 4/18/23 – 5/16/23. Registration deadline extended to 5/2/23!

I just found out my online Feathered Star Workshop for 2023 has already started! But the sign up deadline has been extended so I can let my followers know and they will have a chance to sign up. The workshop is one that you can do at your own pace, so signing up after it has begun is no problem.

“The Feathered Star is an all-time quilter’s favorite, and Marsha McCloskey has been collecting these intricate designs for many years. Feathered Stars aren’t particularly difficult, but they have a lot of pieces and take time. The results are well worth the effort. It’s a design that invites you to slow down and do your best work. Marsha will show you how and tell you why.”

Here’s the link:

Feathered Star Quilting Techniques with Marsha McCloskey | Starts 4/18/2023 | Quilting Daily

RED ALLOVER

Let me tell you about the quilt I’m working on. Remember the subtitle of my Feathered Star Quilt Blocks I book: Really Hard Blocks That Take a Long Time to Make? Well I’m at it again, only with a California Star Medallion quilt that will take a “really long time to make.” The center block is not so hard and I made it a while back, but the first border has 40 three-inch Ohio Stars. I seem to be making 4 blocks a day. The next border is a double-sawtooth and has 200 two-triangle squares. That’s a lot of bias-strips. Then I plan a sampler border of fourteen 12” blocks that all involve two triangle squares: some are new Feathered Star designs, some are traditional blocks that just have lots of triangles. The design involves lattices with about another 250 two-triangles squares

9"centerCAFSIMG_1932

I’m apparently not over the red and white craze inspired by the red and white quilt exhibit in New York a few years ago — and I do love my red stash. I realize some of the prints I’m pulling for this very scrappy quilt are from the 1980s: is that good or bad? The other reds are from my fabric lines Staples V, Raspberry & Cream, and Chocolate & Cherry.Red:whiteFQP

On my website, I put all the red prints I have for sale together on a page called RED ALLOVER. If you go there, along with yardage, you will also see a RED AND WHITE Fat Quarter Pack that I’ve put together to help you build and maintain your stash of red and white prints. I can’t explain it, but as I use up my old red and white prints, I get a little sad that I won’t “have” them anymore — thus the push to find more.http://www.marshamccloskey.com/redallover.html

Here are some other red and white quilts for your enjoyment.

Radiant Star with Tulip Applique

Radiant Star

EnglishIvy6sm

English Ivy

Feathered Star Sampler. jp copy

Feathered Star Sampler

ChamblieRed

Star of Chamblie Sampler


Raspberry & Cream Fabric Line

rcsbomcover
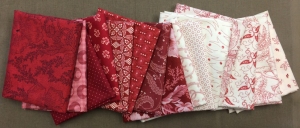
I just heard from Clothworks that my new fabric line, Raspberry & Cream, is now being shipped to stores!! I’ll be getting my bolts at Feathered Star Productions next week! You can see the prints at:
http://www.clothworks.com/…/fabric…/raspberry-and-cream.html

I designed a Block of the Month Pattern for shops to go with the Raspberry & Cream fabrics. The 9″ sampler blocks are from my book, Marsha McCloskey’s Block Party. Shops interested in participating can order the pattern binder on my website. There’s still time!!!
http://www.marshamccloskey.com/wholesale.html
rcsbomcoverrcsbomcover


HOW TO FIGURE YARDAGE FOR A QUILT

It happens regularly: a quilter sees one of my patterns and wants to make the quilt in a different size. She writes to me asking that I figure the yardage for her to make a quilt that measures  x” by  x”. This is what I generally send as a reply.

#1. Most quilt fabric is 42″ to 44″ wide. For figuring purposes, you can count on 40″ usable width after shrinkage and cutting off selvages.

#2. Take each shape of each color in your quilt design and determine how many patches are needed.

Example: Each block needs four 2-1/2″ red squares.

There are 20 blocks. 4 x 20 = 80.

Divide the width of the fabric, 40″, by the cut size of the square, 2.5″,  to get the number of squares that can be cut from one strip 2.5″ wide.

40″/2.5 = 16 squares per row.

Divide the total number of squares needed by the number that can be cut from one strip 2.5″ wide, to get the number of rows of squares needed.

80/16 = 5 rows.

Multiply the number of rows by the size of the square to get the number of inches of fabric needed.

5 x 2.5″ = 12.5″

( If you need other shapes from the same fabric, go through the same process and add the inches together.)

To allow for shrinkage, multiply the number of running inches needed by 106%.

12.5″ x 106% = 13.25″

This is almost 3/8 yard (3/8 yard = 13.5″). So 3/8 yard should be enough fabric for eighty 2-1/2″ squares. If you don’t mind having a little extra, buy ½ yard.

#3. Repeat the above for each shape and fabric in your quilt plan. I know it’s a pain, but if you feel the need to buy just the right amount, then all that figuring is what is needed.

This is also why I do not figure yardage for individuals’ quilts — it just takes a long time and there are a lot of variables … and you’re better off knowing how to do it yourself.

(OR you can make scrap quilts and just collect a whole bunch of reds and when you run out of one print, start cutting from another.)

It is, however useful to get a ball park amount of yardage for a quilt. One method I use is to take the amount of yardage needed for the backing of the quilt and multiply it by 1-1/2 to get an approximate amount for the quilt top. So if you need 6 yards for the backing, you’d need somewhere in the neighborhood of 9 yards (plus) for the top. This is good information in case you go through all the calculating and come up with a total of, say, 25 yards. 25 yards is nowhere near the 9 yard ballpark figure, so you treat that as a clue that something went wrong with your figuring. If your calculations gave you a total needed of 10-1/2 yards, I would consider that in the “ball park” and have confidence to buy that amount.

And then there’s the old saying: “If a fabric is worth buying, it’s worth having.” So buy a little more that you need to build up your stash.


Inches to Yards Chart

This will help you convert your calculations to yardage amounts.


4-1/2” = 1/8 yard

9” = ¼ yard

13-1/2” = 3/8 yard

18” = ½ yard

22-1/2” = 5/8 yard

27” = ¾ yard

31-1/2” = 7/8 yard

36” = 1 yard

40-1/2” = 1-1/8” yards

45” = 1-1/4 yards

49-1/2” = 1-3/8 yards

54” = 1-1/2 yards

58-1/2” = 1-5/8 yards

63” = 1-3/4 yards

67-1/2” = 1-7/8 yards

72” = 2 yards

California Star

9"centerCAFS


I finished my new California Feathered Star block!  This is the one that I made the scrappy bias-strip set ups for. It is sized for a 9″ finished center. I’m working on a block book of 3″ finished blocks and this will be one of the projects. The 3″ Ohio Star is the same one used in the Winter Star block. I gave detailed instructions for its construction in the Winter Star Tutorial last year.  There is another California Star block that has a 7-1/2″ center (2-1/2″ Ohio Stars)  in my book Feathered Star Quilt Blocks II on page 34. The quilt shown here was one of the patterns in my book On to Square Two (out of print*).

IMG_0181

I also have an old quilt, probably from the 1930s or 1940s, that features one huge California Star. The Ohio Stars in this one finish at 9″so the center is 27″ across. I still haven’t figured out why a California Star has Ohio Stars in it…. maybe Variable Stars would be a better name here. Oh well.

100-0001_IMG


See Me on The Quilt Show

As you may already know, I appeared as the featured artist with Alex Anderson and Ricky Tims on The Quilt Show in episode #1203 and talked about my Winter Star pattern. If you didn’t have the opportunity to see this show the first time around, now you’ll have the chance to see it—and so many other terrific shows—at no cost in honor of International Quilting Weekend March 18-20. To find my show go to:
There is also a contest with over $11,000 in prizes featuring a Grand Prize of a BERNINA 570QE. It’s a fun weekend and quilters look forward to it every year.
 http://bit.ly/IQW-2016

Making Scrappy Feather Squares

Today I’m BETA testing my new Bias Square-Plus ruler. What better way to put a ruler through its paces than to cut the pieces for a new Feathered Star block! I’m making a large Feathered Star in red and white. I wanted it to have scrappy feather squares. To get maximum variety of prints and still use the Bias-Strip Piecing technique, I cut 8-1/2″ (the size of the new ruler– how easy is that?) beginning squares from 7 different light reds and 7 different dark reds.

BSP squares

I cut them all into 2″-wide bias strips. Choosing one strip pair from each combination, I stitched the strips together (these are just the longest strip pairs -there are a LOT more strips). Every seam line gives a different fabric combination. Fun.

For further information on Bias-Strip Piecing, see the step-by-step directions in the Winter Star Tutorial.

Scrappy Bias Strips

My block has 2 different sizes of feather squares: 1-5/8″ and 1-9/16″. One is only 1/16″ larger than the other. To keep the sizes separate, I cut all the larger squares first and put them in a marked plastic bag for safe keeping.

Scrappy Bias Squares

Next are the 1-9/16″ squares, which also have a plastic bag.

BSP-red and white

The new Bias Square-Plus ruler is 1/2″ larger than the old 8″ Bias Square from Martingale, has dashed lines for the 1/8″ dimensions, and markings at the edges and down the bias line for 1/16ths. The original Bias Square rulers were designed in the 1980s by Nancy J. Martin for That Patchwork Place, but went out of print last year. Nancy and I developed the bias-strip piecing technique together, and I LOVED the 8″ Bias Square. It was (and is) one of my favorite rulers for cutting squares. I couldn’t stand the thought of not having it available anymore. To get rights to the design and the Bias Square name, Nancy obtained permission from Martingale (formerly That Patchwork Place) and granted it to me. One has to be careful of copyrights. It will be the fifth ruler produced by my small company, Feathered Star Productions, and will be available later this Spring (2016). The changes made to the design make it even more useful.